For the first two, I bought two quilting cottons from Peapod Fabrics. I'm lucky enough to live very close to Peapod, and the owner carries a beautiful collection of prints. I did the first tank, with no modifications to the pattern, out of the slightly heavier cotton print. It's such a cheerful color, and goes so well with my red cardigan!
 |
| Sorry for the low-res photos. Yes, I've gotten into Instagram. |
For the second one, I had some 100% cotton lace edging that I knew I wanted to use. After playing around with several options, I decided to put it around the neckline. The effect is very sweet in a way that makes me think of Anne of Green Gables or Little House on the Prairie. It's not a look I go for every day, but I like it nonetheless.
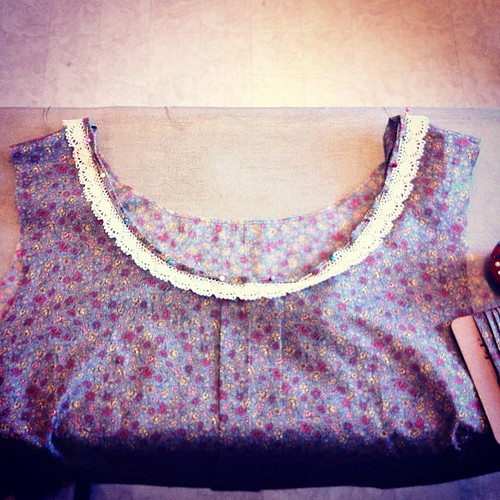 |
| Taken before I'd finished the sleeves. |
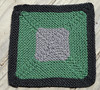
This fabric was much more lightweight than the first one, and made me think that perhaps I could've used a bit more room in the bust on the first one. I was reluctant to print out the entire pattern again just so I could cut a larger size, so before making the third one I decided to dive into doing my first full bust adjustment (FBA for short). I sat down with my scissors, tape, extra paper, ruler, and then spent about two hours reading tutorials before I felt I had a good idea of what I was doing. Because the Sorbetto doesn't have waist darts I ended up adding a significant amount of space to the waist circumference, so in the future I might grade that down just a bit to compensate. This is what my pattern piece looked like before I filled in the gaps with extra paper. I'm not sure that I drew the new bust dart in exactly the right place, but it gave me the extra room I was looking for.
 |
| Doing a FBA makes you feel as smart as doing calculus. |
I also decided my third Sorbetto should be a tee instead of a tank, and I used the free sleeve pattern from Sew, Incidentally. I was a little apprehensive that it only came in one size, but it worked like a charm. In the future, I think this would be a great pattern to practice drafting sleeves for, since it's not too complex. Once I'd attached the sleeves and tried on the top, it was immediately obvious how much the FBA helped. I never realized how accustomed I'd become to wearing tops that never had enough fabric in the bust! I actually have enough freedom of movement of my arms in this top, and the fronts of the sleeve seams aren't under strain. This was a huge step for me in terms of expanding my sewing knowledge. I pulled out a fat quarter of a sweet Liberty of London print for my bias tape edging, and improvised a keyhole opening at the back of the neck (I was inspired by the photo in the bias tape tutorial).
 |
| Hanging from the door to our ironing board closet. |
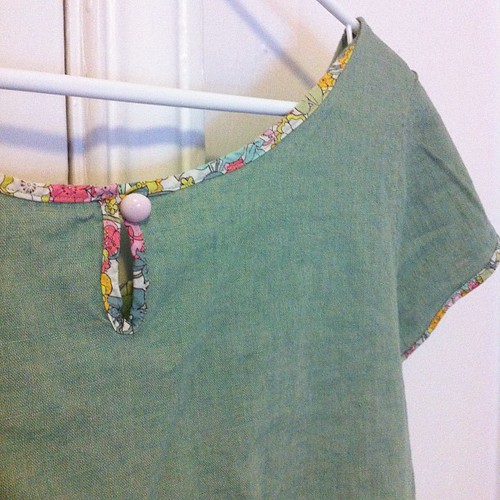 |
| Those Liberty prints kill me every time! So gorgeous! |
The finishing is a little rough on the inside of that opening, but I'm pretty proud of myself for making it up. These three tops are already in my regular rotation, and I'm certain I'll be making more from this pattern. I've seen so many adorable variations: inverting the pleat, leaving the pleat open on the bottom, eliminating the pleat altogether, different sleeve styles, lengthening the bottom hem for a tunic or short dress... this dress and tank are two of my favorite versions of all the ones I've seen on the web. The only downside to all this sewing with woven fabrics is that I'm doing a lot more ironing in the mornings when I get ready for work, but it's so worth it knowing I'm wearing something that I made and that is truly unique!


2 comments:
Jess, these are all so incredible. I am really looking forward to being home with my sewing machine and trying to bust something out. Any advice? I'm definitely reading your stuff about the FBA and having NO CLUE what any of it means -- did you essentially just make it a piece with darts? Or...was there more to it? Do you think your initial top is too tight, in retrospect? I read that bit over and over again and still couldn't quite figure out what it all meant :D I can't believe how amazingly crafty you are, darling.
Great Sorbettos! You are inspiring me. Also, you have an ironing board closet? I am jealous! :)
Post a Comment