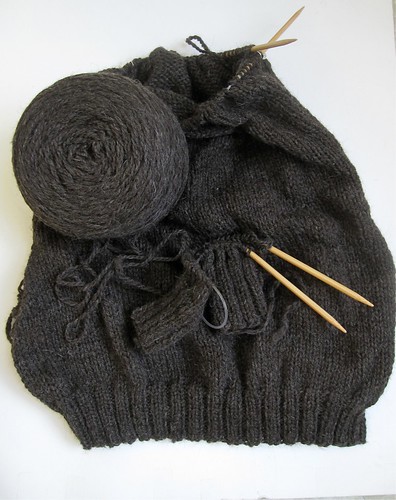
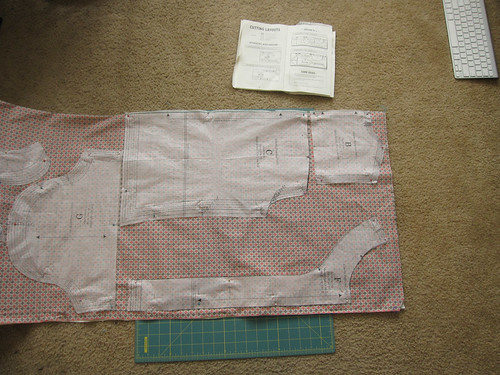
In the past few years, I've begun to sense a theme for October, and that theme is crazy. This year, though, it turned out to be extra crazy. I know I still owe the blog one last Scotland post, and there are a couple more finished objects to share with you before we launch into holiday knitting. The reason this year has been extra crazy is partially election season, but mostly it's been crazy because Mr. Starryknit and I are moving into a new (larger! with a deck!) apartment. Plus, the way the timing worked out I'll be going to Mitten School one week before our move. For those of you playing along at home, that means that we move in about eight days and I'll be spending four of them out of town. All of our stuff is in boxes, and I'm separated from my stash. The yarn and fiber are all in large plastic bins with lavender sachets or bags of cedar chips, the pattern books are all in boxes. The fabric stash is still a weak underdeveloped thing compared to its yarn and fiber siblings, so it all fit into one small box. The sewing machine is sitting in its dust cover in the closet. I managed to have enough foresight to pull out yarn for three new projects in the meantime, in case it takes a long time to get everything settled. The criteria for these projects were:
1. Variety: Different yarn weights (one sock, one lace, and one aran), different colors, different objects, different difficulty levels. When I'm finished with the current work-in-progress, I wanted to have some choices so hopefully something would be appealing enough to appease the need to stash-dive.
2. A mix of direction and spontaneity: two of the projects have yarn already matched to patterns, while the third one has only a a vague constraint (it must be fingerless mitts). If I just need something to knit, I can pick up and start the sock right away. If I want to use a little creativity or I just want an excuse to surf Ravelry, I can take time to search for the perfect mitt pattern.
3. Portable: These projects need to be easy to carry, and hard to lose in the move. They definitely need to fit in small project bags. The mitered square blanket that takes up an entire jumbo-sized tote bag is right out.
I spent an hour or two picking out these projects, then declared everything else fair game for packing up. Then, while packing for my flight to Kansas this evening, I realized the my current project probably won't last me through the entire plane trip and grabbed the skein of yarn and realized:
We already packed the ball winder.
Thursday, November 8, 2012
Wednesday, October 10, 2012
Knitting FO: Birthday Hat
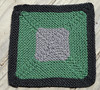
Last year our knitting circle decided to organize a birthday swap of handknit cowls. We had such a great time doing it that we're doing it again this year, only with hats. Since there were a few birthdays that were happening quite soon, I volunteered to knit one of the first birthday hats of the year on a roughly three-week deadline. The hat ended up being made entirely out of handspun, although I could never have guessed that this is what I'd end up using the handspun for! It started out as a bump of fiber from Hello Yarn in the colorway Garden Walk:
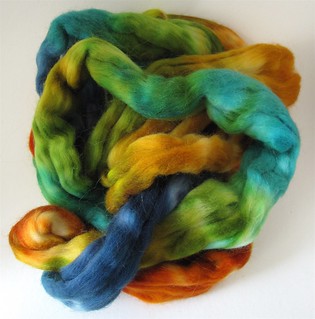 which I then tore into chunks of similar color, carded into batts,
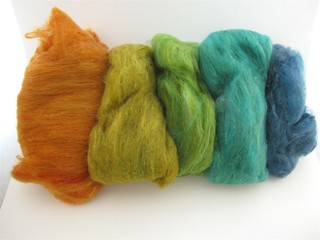 and spun into into mini-skeins of individual colors. Here they're all tied up together for washing:
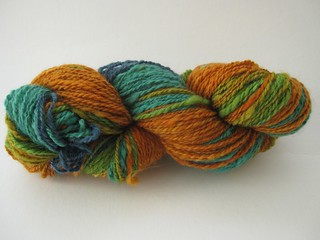 Now, I wasn't 100% pleased with this yarn. I'd originally intended to knit it into handspun Fiddlehead mittens, but didn't feel that the weight of the yarn was quite right, or consistent enough for the pattern. So the yarn hung out in the stash for another two years. Enter the "With Love from Norway" hat pattern, some white undyed cormo handspun yarn, and destiny took over.
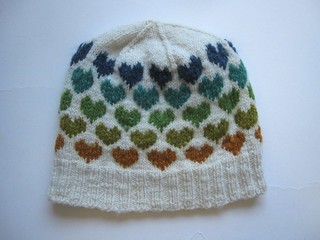 I'm so in love with this hat. It's a very cute pattern, and it looks great on its recipient. I was a little worried about the color in between the orange and green (it doesn't look too amazing all by itself, it's a little... barfy), but in the progression with all the other colors it looks great!
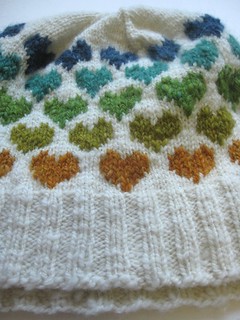 My handspun is a little lighter in weight than the yarn called for in the pattern, so I added two hearts to the circumference of the hat and knit it on size 4 needles instead of size 6. The best part is that I've forgotten how much yarn it takes to make a hat, and I'm nearly certain that I have enough yarn to make another one.
That's right, it's time to start thinking about holiday knitting. Dun dun dun.
That's right, it's time to start thinking about holiday knitting. Dun dun dun.
Thursday, September 20, 2012
Scotland: The Yarn
As soon as it was decided (back in February) that we'd be going to Scotland, the first thing I researched was how long it would take us to get to the Shetland Isles. I wanted to pet sheep. I wanted to visit a spinning and/or weaving mill. I was going to come home with SO. MUCH. YARN. Sure, I knew that Shetland was on a separate island, but I've done the whole international travel thing before. We'd have rental cars! Surely there'd be a ferry or somesuch.
Turns out that Shetland was a little farther away than I was envisioning. I'd imagined a two- or three-hour boat ride that would whisk me from Aberdeen or Inverness to Lerwick. There'd a cabin below where I could order tea and sandwiches, and a deck above where I could gaze out to the horizon, the cold winds off the North Sea romantically blowing through my hair. I'd pass the time knitting, of course. It's funny now how easily my imagination plucked up the San Francisco-to-Sausalito ferry route from my memory and filled the surroundings with a colder ocean and less landmass.
In doing my research on the web, I found that while the British Isles might be small in comparison to the USA, they weren't quite as small as I'd thought. The city of Aberdeen is located about a four hours' drive from our resort. The actual ferry from Aberdeen to Lerwick departs at either 5PM or 7PM (depending on the day of the week), and arrives at 7:30AM the next morning. The see-all-the-sights travel planner in me couldn't bear to give up so much time to sitting in transit when there was the entire rest of Scotland to see. Oh well. I'd still find me some yarn.
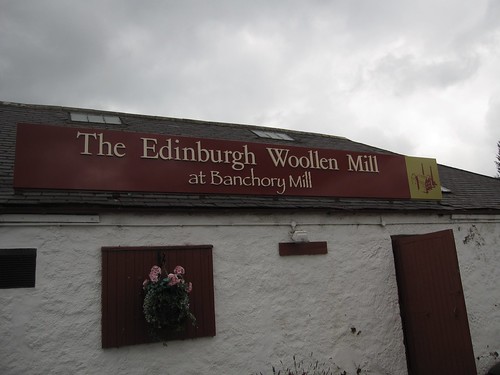
Once we got to Scotland, I realized quickly how deeply the culture is rooted in the manufacture of textiles. I also quickly learned to distinguish what is typically meant by a "woolen mill". We passed several during our initial forays, and after demanding that the caravan pull over once or twice I determined that most of the time a shop advertising itself as a woolen mill would NOT be selling yarn or spinning fiber, but finished sweaters, scarves, hats, mittens, and blankets made of wool.
In one particularly frustrating experience, we had all just gotten into our cars and been driving for maybe two minutes when we passed a shop with a spinning wheel painted on its side. You use spinning wheels to make yarn! I was SO CERTAIN that I would find some yarn this time! Sadly, this was not the case. Once back in the car, I realized that the abundance of items produced from wool along with the (apparent) lack of raw materials probably means that the raw materials are all being used in the local industry. It's not that there isn't a lot of yarn or wool in Scotland, it's that it's all being used, and there isn't a huge market for hobbyists. This was the turning point in my understanding of the connection between Scottish textiles and the residents of Scotland. If I really, seriously, wanted spinning fiber, I would've needed to seek out a farmer and see where they get their wool processed. At that point, I'd need to be prepared to pay a much higher rate than the folks running spinning mills, and even then all the wool they have in hand would probably already be spoken for. I wasn't going to be able to find yarn unless I found a yarn shop. So, find a yarn shop I did.
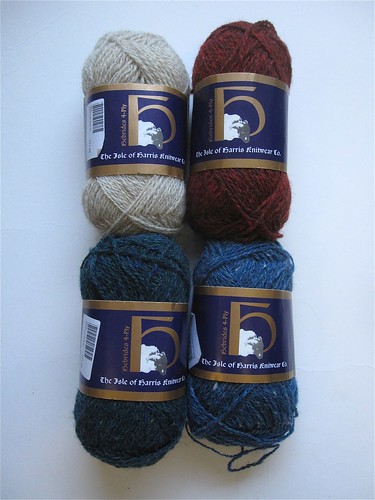
All four of these are heathery yarns, and my photography doesn't do justice to the deep marine-blue-green of the ball in the lower left. After I'd picked out these shades, I spied something really special in a little basket next to the Jamieson's yarns:

Turns out that Shetland was a little farther away than I was envisioning. I'd imagined a two- or three-hour boat ride that would whisk me from Aberdeen or Inverness to Lerwick. There'd a cabin below where I could order tea and sandwiches, and a deck above where I could gaze out to the horizon, the cold winds off the North Sea romantically blowing through my hair. I'd pass the time knitting, of course. It's funny now how easily my imagination plucked up the San Francisco-to-Sausalito ferry route from my memory and filled the surroundings with a colder ocean and less landmass.
In doing my research on the web, I found that while the British Isles might be small in comparison to the USA, they weren't quite as small as I'd thought. The city of Aberdeen is located about a four hours' drive from our resort. The actual ferry from Aberdeen to Lerwick departs at either 5PM or 7PM (depending on the day of the week), and arrives at 7:30AM the next morning. The see-all-the-sights travel planner in me couldn't bear to give up so much time to sitting in transit when there was the entire rest of Scotland to see. Oh well. I'd still find me some yarn.
 |
| This store does not sell yarn. Sad face. |
 |
| This place DOES sell yarn! |
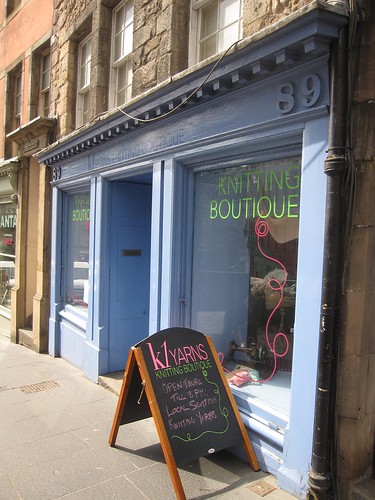
While walking through Edinburgh, I was on a mission. After we located the shop, two of my traveling companions graciously agreed to entertain themselves in a nearby cheese shop. The fourth companion came with me, to purchase souvenir yarn for his girlfriend. The person working at the shop was wonderfully helpful, assisting him in choosing yarn that she wouldn't be able to find in the US, which left me free to browse around myself. I, too, was on the lookout for yarn that I wouldn't just find on the shelf of my LYS. I was also nearly finished with my Neep Heid hat, and had my eye open for yarn that would work in either of the other two patterns in Kate Davies' fantastic e-booklet The Hats of Midlothian. I found yarn of roughly the right weight from The Isle of Harris Knitwear Co., and settled down to choose colors.
All four of these are heathery yarns, and my photography doesn't do justice to the deep marine-blue-green of the ball in the lower left. After I'd picked out these shades, I spied something really special in a little basket next to the Jamieson's yarns:
The labels look as though they were printed at home and snipped into strips, which I love. I'm not exactly sure, but I'm betting that these colors are undyed, the natural colors of the sheep raised on the Isle of Mull. They had to come home with me as well. I can't wait to spend a day with all my crunchy, wooly, Shetland-y yarn playing around with color combinations!
In the midst of my yarn adventures, there also turned out to be some fabric adventures in Scotland. I've decided that they need their own (shorter) post, so that'll come up soon after I share a few finished projects with you guys.
Wednesday, September 5, 2012
Scotland: The Countryside
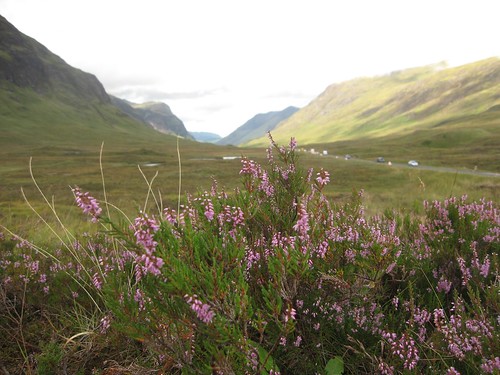
The freedom provided by having rental cars allowed us to explore the countryside of Scotland, and boy does it have some spectacular sights. On two different days we drove through the Cairgorms National Park. Although "national park" doesn't mean exactly the same thing in Scotland as it does in the USA in terms of usage and infrastructure, the views and beauty of nature rival anything else I've ever seen.
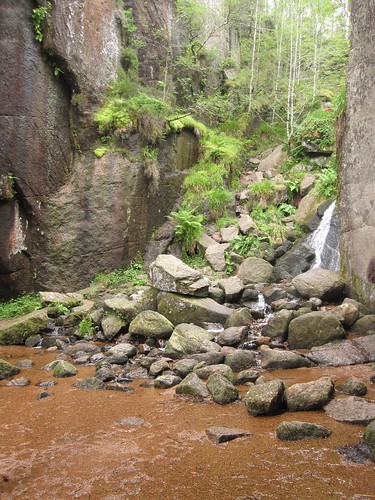
Everywhere you turn, the land is there, just sitting around being gorgeous. This place, called Burn O' Vat, had a lovely little waterfall and two shallow caves.
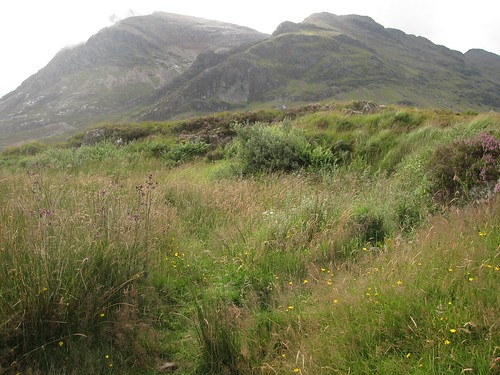
Here's one of my favorite memories of the trip, in the Cairngorms. Scotland has an old tradition of its residents being able to walk pretty much everywhere, as long as they're not leaving a mess or disturbing other people. There are trails and footpaths everywhere, and we saw people using them, walking in places I would assume were off-limits if we were in the US. We did a little bit of hiking, but if we'd planned for it we could've done much more. I think Americans have this sense that Britain is a very small place, but it certainly didn't feel that way to me while we were there. Edinburgh during festival season felt just as bustling and alive as San Francisco during fleet week, and the Cairngorms felt just as open and majestic as the High Sierras.
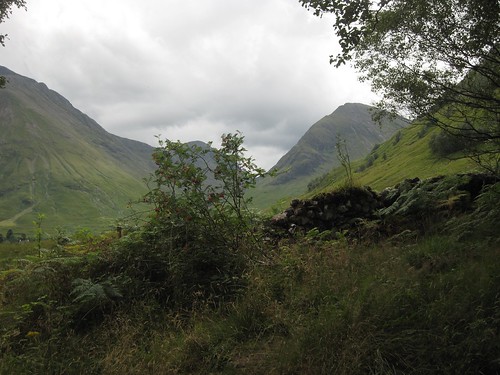 And then there's this aspect of the history of the land in Scotland. We were originally going to drive to the Isle of Skye, but unfortunately it proved to be just a bit too far of a drive for a day trip. Instead, we opted to go to Glen Coe, which several guidebooks mentioned as one of the most beautiful glens in the highlands. We did get a chance to do a bit of real hiking here, and the sense of the place is strong and old in a way that is no less wild, but very different, to what I've seen in American national parks. There's certainly a lot of history behind Glen Coe, and it's eye-opening to visit national landmarks that belong to someone else. I can feel some deeper personal connection to Mt. Tamalpais or Hume Lake, and knowing that there's another set of people who feel just as strong a connection (if not stronger) to these places helps me feel connected to those people through a shared experience. Seeing the world's natural wonders makes environmentalists of us all.
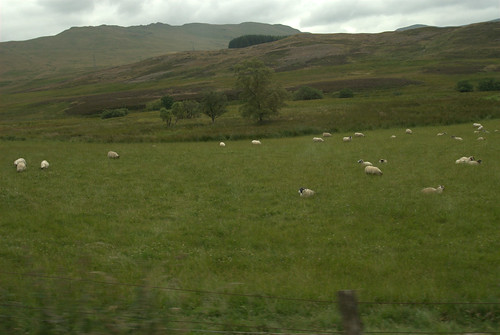
As a small footnote, it's hard to look at the countryside of Scotland and not notice the sheep everywhere, which live off the land, and are an integral part of life for many people in the highlands.
Next time: From the Land comes the Cloth
Everywhere you turn, the land is there, just sitting around being gorgeous. This place, called Burn O' Vat, had a lovely little waterfall and two shallow caves.
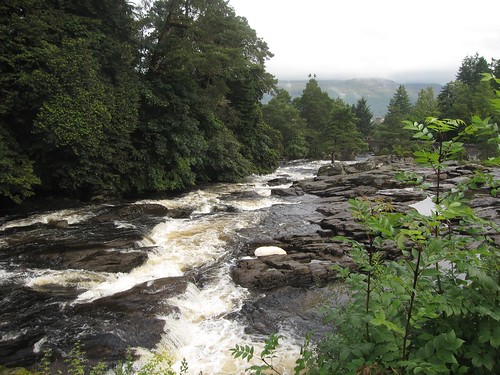
This spectacular view of the Falls of Docharty was taken literally from the side of the road. Later in the week, we put a special "photos" rule in place while driving. It was getting pretty stressful keeping a caravan of two or three cars together, so we opted to be a bit more explicitly relaxed about it, and agreed that if one car stopped and there was no phone call or text message, then they were just taking a few photos and would catch up. It's the sort of thing that would go unspoken between the husbeast and me, and it wasn't until we figured out this rule that we realized how much we just wanted to be able to pull over on the side of the road ALL THE TIME! The new photos rule was especially welcome on the part of the husbeast, as he's a big one for stopping at random places to get a really good photograph.
Here's one of my favorite memories of the trip, in the Cairngorms. Scotland has an old tradition of its residents being able to walk pretty much everywhere, as long as they're not leaving a mess or disturbing other people. There are trails and footpaths everywhere, and we saw people using them, walking in places I would assume were off-limits if we were in the US. We did a little bit of hiking, but if we'd planned for it we could've done much more. I think Americans have this sense that Britain is a very small place, but it certainly didn't feel that way to me while we were there. Edinburgh during festival season felt just as bustling and alive as San Francisco during fleet week, and the Cairngorms felt just as open and majestic as the High Sierras.
As a small footnote, it's hard to look at the countryside of Scotland and not notice the sheep everywhere, which live off the land, and are an integral part of life for many people in the highlands.
Next time: From the Land comes the Cloth
Thursday, August 23, 2012
Scotland: The Cities
Cities will suck the life right out of you, but in a good
way. This is something I’ve learned is
true all over the world. London, Los
Angeles, Munich, San Francisco, Genoa, Berlin, and Lyon have all left me
feeling bone-tired and in need of a pint of something after spending a full day
seeing their sights, and now I can add Glasgow and Edinburgh to that list. The first time you see a new city requires a
staggering amount of mental energy. They
demand that you take in everything they have to offer: their food (fast and
cheap or slow and expensive but almost always good), their buildings (new, old,
filled with stories and memories), and their people (folks that really aren’t
that different from yourself, although they might speak a different language
and have different pictures on their money).
We saw Glasgow on our first full day in Scotland, which
meant that we were still navigating the logistics of driving and caravanning
with a large group. We started at the
Glasgow Cathedral, which easily rivals anything I saw on the continent in
2008. Being a huge Harry Potter fan, I
was delighted to learn that this church is also known as St. Mungo’s
Cathedral.
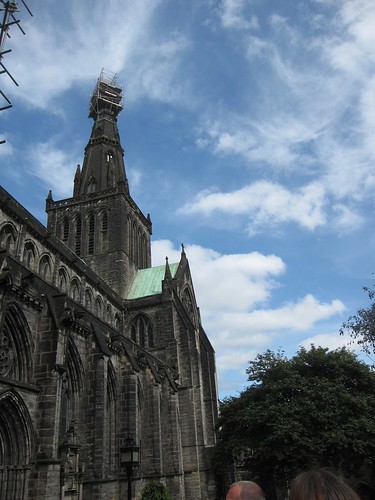 |
| Glasgow Cathedral (or St. Mungo's) |
I loved the sacristy especially, which had several Bible
verses spelled out in letter tiles on the floor. The verses were all centered on the theme of
walking and paths. Around the central
pillar it reads “Guide our feet into the way of peace”, and around the edge of
the room there are four verses: “He that walketh upright walketh surely”, “Let
us run with patience the race that is set before us”, “Hold up my goings in thy
paths that I may slip not”, and “”. It seemed to me like the perfect place for
pacing contemplation. A few circuits
around the room would be enough to stretch your legs, meditate on the words
embedded in the floor, and take you past the fireplace once each turn.
After lunch in the nearby café, the group split up to see
things they each found interesting.
Being huge fans of the Arts & Crafts movement, we went on a trek
through the main shopping drag to see the Willow Tea Rooms and the Glasgow
School of Art, both designed by Charles Rennie Makintosh. Sadly we arrived too late to get on one of
the tours of the school of art, but we able to peer around some of the
buildings.
 |
| Walking through Glasgow |
Even though we didn’t go into many places in Glasgow, we did
get to walk around a fair bit and see quite a lot of the city. At one point we inadvertently walked through
a small college in the middle of the city (University of Strathclyde), and
unmistakably heard a student playing bagpipes in their dorm room. Glasgow definitely felt industrial compared
to Edinburgh. If we hadn’t all been
nervous about driving home in the dark, I think we would have stayed for dinner
and a beer, but as it was we were still tired and turned for home before
dark.
If on our first day I took a few dainty sips of Glasgow,
then I certainly tried to swallow Edinburgh whole on our second-to-last
day. August is the festival season for
Edinburgh, and the city is notoriously packed, so we decided to take the train
into the city early in the morning. That
would drop us off in the middle of everything around 10AM, and the last train
back to Pitlochry (our starting point) left around 7:30, which we figured was
enough time to hit the highlights. An
additional day in the city would have been nice, but I’d be saying that even if
we’d spent a month in Scotland.
After so much driving during the rest of the week, taking
the train was a stroke of genius. We had
a short drive into Pitlochry around 7:30 AM, picked up our tickets from the
counter, and spent out train ride discussing what we wanted to see. Only half of our group wanted to see
Edinburgh, so we had a row of seats to ourselves. I worked on my knitting, and in another
Potteresque moment, the husbeast bought coffee from the snack trolley. We arrived feeling refreshed, and knowing
that everyone could have a beer with dinner since nobody had to drive
home.
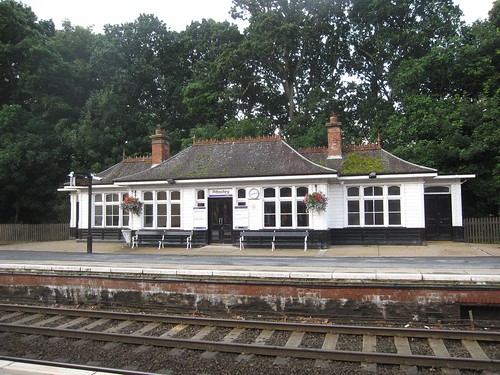 |
| The Pitlochry train station, nearly empty around 8AM. |
It took some time for us to get oriented to the city, but we
eventually found our way to St. Giles’ Cathedral, our first stop.
 |
| St. Giles's Cathedral, plus festival tents |
I have to mention the place we had lunch: The Outsider, on
George IV Bridge Street. The food and
beverages were just delightful: I had coley (a white fish) with mushroom
risotto and peas, and the husbeast had a tasty-sounding pork chop. It was a really delightful
place to eat in the middle of the bustle of the city. Fortified with such excellent food, we got
back on the Royal Mile and walked up to Edinburgh Castle. Unfortunately, we hadn’t really timed it well
in terms of the crowds. We opted to take
in the lovely views of the castle’s exterior rather than standing in the line
to go inside.
 |
| Edinburgh Castle from the outside |
The rest of the group was very kind in humoring me in
walking back along the Royal Mile and taking a slight detour:
|
| An LYS! In the wild! |
I may have bought a little bit of yarn, but more details on
that later. I was very pleased at the
selection of Scottish yarns they had available, and the person working when we
went in was very helpful in helping one of our party choose yarn to take back for
his girlfriend. The husbeast acquired
some cheese while we were yarn shopping.
Our next stop was at the other end of the Royal Mile: Holyrood House
Palace, and the Queen’s Gallery.
 |
| Holyrood House Palace Exterior |
Holyrood was very interesting, and the audioguide included
in the ticket price was incredibly detailed.
I particularly enjoyed seeing the rooms inhabited by Mary, Queen of
Scots and her portrait. The ruins of
Holyrood Abbey, open to the sky, are a wonderful end cap to the tour of the
palace grounds. I also opted to pay for
entrance to the Queen’s Gallery, which had some very fine paintings.
 |
| Holyrood Abbey Ruins |
At this point, I looked at the time and realized that I was
not going to be able to see one of the items on my list: The National
Gallery. It would close in 20 minutes,
and was back at the Castle end of the Royal Mile. We decided to walk back at a more leisurely
pace, and did a bit of souvenir shopping along the way. Since we were all feeling a bit footsore, we
opted to make our last activity dinner near the train station. By the time we finished with dinner, it had
started to rain quite heavily. This made
the final walk to the train station a bit harrowing, as we were nervous about
getting there in enough time to find our platform (sadly, 19 rather than 9
¾). Plus, I was wearing less than ideal
footwear, and kept slipping in puddles.
I was also the only one with an umbrella, so we were all quite soggy
when we collapsed into our seats on the train.
Between the rain, my shoes, and the entire day of walking, I
was quite exhausted and a bit cranky when we got on the train, but it was
nothing that a peaceful ride and a hot cup of tea from the trolley couldn’t
fix.
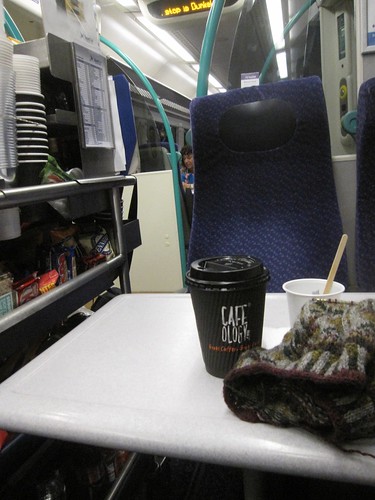 |
| My super-sneaky side shot of the trolley, plus tea & knitting. |
Monday, August 20, 2012
Scotland: Introduction
Well, I'm back.
We had a wonderful time in Scotland, and I'm planning out a few blog posts on our adventures. I'm thinking one post will be about the country, one about the cities, and one about the yarn/fabric/wool tradition that really permeates the land and industry in Scotland. This was our third trip across the Atlantic, and I found myself making many comparisons to our travels to Germany, France, and Italy in 2008, and our short trip to London in 2007 (which predates the blog). In some ways, this trip wasn't as relaxing as those other trips: we had horrendous issues with our flights, and driving on the other side of the road was a bit harrowing for everyone. Transportation hasn't been such an issue before; we didn't rent a car when we went to London, and everyone else in Europe drives on the same side of the road as we do. I don't want to get into too many details on how stressful our flights were, but suffice it to say our journey home involved lost seat reservations, a cancelled flight, being awake for 23 hours straight, and an unexpected overnight stay in Newark, NJ. And that was just on the flight home. In other ways, this was a truly fantastic trip, better than any other we've taken: there was no language barrier as in Europe, we were more seasoned travelers than when we went to London, and we got to spend quality time with some very dear friends. Plus, there's sheep everywhere.
The strangest part of this vacation is that I didn't feel really rested, or energized, or any of those other sensations that you're supposed to get while on vacation until after it was all over. Looking over our photos, re-reading my journal in preparation for writing these blog posts, touching the souvenir textiles we brought home, and doing more research on the interesting things we learned are giving me the energy to jump into a new semester. I truly believe that learning about other parts of the world and getting to know the people who live there makes us better human beings, which is why we choose to travel both inside and outside the US. I also have a deep-seated love of the British Isles, and I know this journey will add another set of very fond memories to buoy our spirits in the coming months.
 |
| Cairngorm National Park |
 |
| A typical view from the car |
 |
| Holyrood Abbey, Edinburgh |
Wednesday, August 15, 2012
Sewing FOs: Ginger Skirts
Continuing my love affair with Colette Patterns was difficult, because I was apprehensive about inserting a zipper. I'd purchased the Hazel dress pattern, and been gifted an invisible zipper foot for my machine for my birthday. I had more of that lovely soft linen that I used for my Sorbetto tee in a pale lavender. But I was very wary of going through the process of sewing a whole dress (and my first real dress, too) only to get bogged down in a zipper. Knitters, I know you can relate: there's always that one really adorable sweater that you have languishing because you have to set in the sleeves or pick up the button band. You know you can figure it out, but it sits there for a long time while you get your act together. Same thing with this zipper, except I was putting off the whole dress because of my apprehension.
Luckily for me, Kristine offered a sewing class at Verb on the Ginger skirt, which calls for an invisible zipper! And it was on a Friday, which was actually incredibly convenient for my schedule. I signed up for a whole day of sewing class.
I actually had enough time to insert my zipper during class, and sure enough I did it wrong the first time. It was frustrating to have to rip it out, and using the invisible zipper foot was a little non-intuitive, so I'm glad I had a teacher to lead me through the process. It certainly didn't help that my fabric was a mediumweight navy blue wool, which made it difficult to tell the right side from the wrong side.
I made version #2 of this skirt, which has a very cute curved waistband. I wasn't 100% sure that it would show up well in a heavier fabric, but it turned out just fine!
I had just finished putting in the zipper when our class time ended, and all the while had been contemplating putting in a lining. Verb's sewing instructor Jessie was incredibly helpful, and talked me through what that process would look like. Once I got home I realized I had a lovely white-and-blue striped cotton voile that was perfect. So I cut the two skirt pattern pieces again, sewed the side seams, and basted the lining to the seam allowance of the waistband. Since I hadn't yet attached the waistband facing, it was just the right stage to make a decision about the lining. I had to wing it at several stages, especially when fitting the lining fabric around the zipper, but it looks fine. And the skirt feels soooo comfy with a smooth cotton lining! I had originally wanted to add pockets as well, but decided it was better to not try too many new things at once.
The hem, as you can sort of see in the above photo, is very deep. I made the skirt a few inches shorter than it appears on the model photos on the Colette website to suit my taste. One thing I've learned about skirts is that they have to end above the widest part of my calf muscle. I actually made this one shorter still, so it ends right around my knees. Just like my Owls sweater, the navy blue is a classic color that will merge well with the rest of my clothing. I've already worn the skirt out to nice dinners twice, and it'll definitely be a good workplace piece as well. I have ideas for future versions as well: changing the a-line for a more straight or pencil shape, different waistbands that are included in the pattern, adding pockets, and I spotted a beautiful deep red nubby woven wool that would make a great addition for winter.
 |
| The view out the shop window. |
I made version #2 of this skirt, which has a very cute curved waistband. I wasn't 100% sure that it would show up well in a heavier fabric, but it turned out just fine!
 |
| All hemmed and pressed! |
 |
| Lining! So cute! |
Wednesday, August 8, 2012
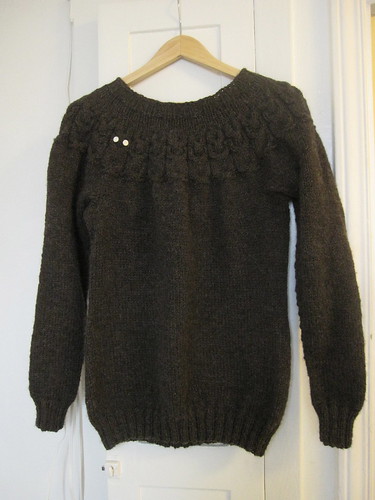
Knitting FO: Owls Sweater
I have been wanting to make Kate Davies' Owls sweater for a long time, probably about 2 milliseconds after I discovered the pattern existed. It's taken me an embarrassingly long time to a) get around to knitting it and b) finishing the darn thing, given how well the design fits with the rest of my wardrobe. I first downloaded the pattern back when it was free, and then purchased it when the designer updated the pattern with better notes and more sizes. This project is a little different than others I've knit because I made lots of changes based on what other knitters said in their project notes on Ravelry.
As an aside, I feel that this is one of the best uses of Ravelry, particularly for me since I'm not a model-sized person. Although there are notable exceptions, not many designers photograph their work in a wide range of sample sizes, so I use Ravelry as a gallery of what any given pattern is going to look like on a larger body type. I've definitely decided to not knit certain patterns when I discovered I didn't find them that flattering on larger people.
I actually made a ton of modifications to the pattern, starting with the yarn. I knew from past experience that knitting a sweater out of very chunky yarn adds lots of bulk to my frame. I certainly don't need to look like I have even more padding than what nature gave me. Owls calls for a very bulky yarn, and the first thing I did while browsing the 5,000+ projects was see what lighter yarns folks had used to knit the pattern. Cascade Ecological Wool was a clear winner and turned out to be quite reasonably priced, so I picked out a dark heathered brownish-grey (or is it greyish-brown? I can't tell!). The downside of having all this info from Ravelry at my fingertips is that it tells me that I stashed that yarn back in April of 2010. Yikes!
I started swatching in January to check my gauge like a good knitter, and worked out that I would need to make a sweater just a bit bigger than the largest size in order for it to fit me at the gauge I was getting. Great, more math. While I was swatching, I made a sort of half-informed decision based on other knitters' project notes to just make up the body and sleeves as I went along. My reasoning was that I would need to do lots of math to create a larger size anyway because of my gauge, and I've had issues with sleeves being too tight or too short in the past, so I might as well make it from scratch anyway. So that's what I did! I figured out how many stitches to cast on based on my swatch (which thankfully did not lie), then decreased at either side for some waist shaping, then increased again on either side for bust shaping, trying it on as I went. I also remembered to always stand up when trying on the body of a sweater, so I wouldn't end up with something that was only long enough to cover the top of my jeans while sitting. I finished the body up to the armpits in March, and then promptly declared sleeves to be boring and stuffed the whole thing in a tote bag for several months.
After finishing a pair of socks more suddenly than I'd intended, I needed to grab something in a hurry for knit night, and remembered that all I had was boring sleeves. Since I was running late, I didn't have time to pick something out of the stash, so it had to be sleeves. I was smart and did my sleeves two-at-a-time though, so at least I didn't have to take too many notes on what I was doing in order to get matching sleeves. After joining the sleeves to the body, the sweater got to be quite unwieldy and not really that good for knitting on the bus, so my progress slowed a bit. But since I'd been bitten by the sewing bug, a part of me really wanted to include this sweater as part of my Seam Allowance goals. I know a lot more about knitting than I do about sewing, and I think it shows in how well the sweater turned out.
I also opted to only sew buttons on one of my owls for a more understated look, as many other Ravelers have done. I like to think of my owls as being mostly sleepy, with one awake to see what's up. Now that this sweater is done, I learned that I like my sleeves a LOT longer than what's usually written in a pattern. The cuffs can be pulled down almost to my knuckles, which keeps my hands warm. I was able to apply a lot of the knowledge I gained in Ysolda's class last year to make sure that this sweater fit just the way I want it to. Finally, this sweater is going to be very versatile. I can pair it with a skirt, tights, and boots for work, or just with jeans for a weekend. The yarn is warm enough for foggy mornings and evenings, but not knit too dense for California. I'll be testing it out while we're on vacation next week in another typically cool and misty environment: Scotland! I have one more regular blog post lined up to run while we're gone, and many adventures to share when we return!
 |
| Side view of the yoke |
I actually made a ton of modifications to the pattern, starting with the yarn. I knew from past experience that knitting a sweater out of very chunky yarn adds lots of bulk to my frame. I certainly don't need to look like I have even more padding than what nature gave me. Owls calls for a very bulky yarn, and the first thing I did while browsing the 5,000+ projects was see what lighter yarns folks had used to knit the pattern. Cascade Ecological Wool was a clear winner and turned out to be quite reasonably priced, so I picked out a dark heathered brownish-grey (or is it greyish-brown? I can't tell!). The downside of having all this info from Ravelry at my fingertips is that it tells me that I stashed that yarn back in April of 2010. Yikes!
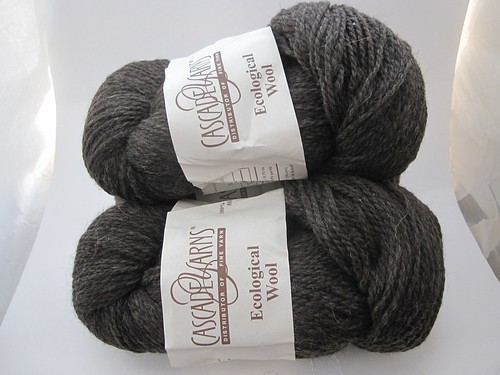 |
| Three skeins ought to be enough, right? |
 | ||
| And this is where it stayed for three months. |
 |
| The whole sweater! |
I also opted to only sew buttons on one of my owls for a more understated look, as many other Ravelers have done. I like to think of my owls as being mostly sleepy, with one awake to see what's up. Now that this sweater is done, I learned that I like my sleeves a LOT longer than what's usually written in a pattern. The cuffs can be pulled down almost to my knuckles, which keeps my hands warm. I was able to apply a lot of the knowledge I gained in Ysolda's class last year to make sure that this sweater fit just the way I want it to. Finally, this sweater is going to be very versatile. I can pair it with a skirt, tights, and boots for work, or just with jeans for a weekend. The yarn is warm enough for foggy mornings and evenings, but not knit too dense for California. I'll be testing it out while we're on vacation next week in another typically cool and misty environment: Scotland! I have one more regular blog post lined up to run while we're gone, and many adventures to share when we return!
Saturday, August 4, 2012
Sewing FOs: Sorbetto Tanks
This post is a love letter to one of Colette Patterns' most versatile designs, the Sorbetto Tank. It's a free pattern available on their website. You print it out on your home printer and tape the paper pieces together, meaning you can start your new sewing project IMMEDIATELY, as I felt I needed to one night. There are so many great things about this pattern: it looks good in a solid or a print, it only has two pattern pieces, the sizing is very forgiving, and the possible modifications are endless. Like so many of their patterns, it also easily transitions from work to weekend, an element I want more of in my closet. So far this summer I've made three.
For the first two, I bought two quilting cottons from Peapod Fabrics. I'm lucky enough to live very close to Peapod, and the owner carries a beautiful collection of prints. I did the first tank, with no modifications to the pattern, out of the slightly heavier cotton print. It's such a cheerful color, and goes so well with my red cardigan!
Originally I'd tried finishing the raw neckline and sleeve edges with a bright red ribbon, but it didn't look very good and the ribbon wouldn't lie flat. As I was making the bias tape from my fabric scraps, I remembered that since bias tape is cut diagonally to the warp & weft threads of a woven fabric, it has more stretch and give, allowing it to lie smoothly around the curved edges of the garment. I've probably worn this tank top five or six times since finishing it. Incidentally, I also used the continuous bias tape tutorial from the Colette blog, and it's my favorite way to make bias tape, especially if all you have is smaller scraps.
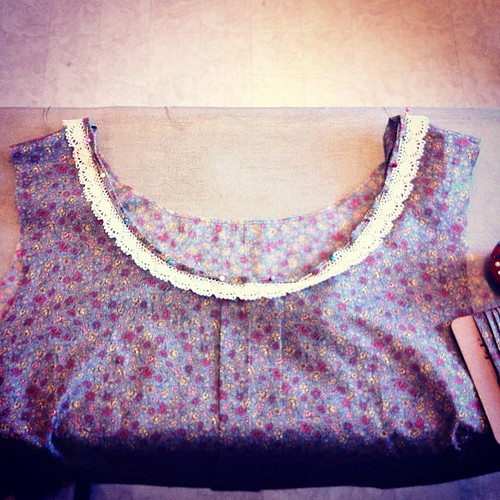
For the second one, I had some 100% cotton lace edging that I knew I wanted to use. After playing around with several options, I decided to put it around the neckline. The effect is very sweet in a way that makes me think of Anne of Green Gables or Little House on the Prairie. It's not a look I go for every day, but I like it nonetheless.
The main fabric is a soft linen that I got from an enormous discount fabric store near my parents' home in southern California. I have so many memories of going to this fabric store with my mom as a little kid, but that's another post for another day. Here's a closeup of the back neck:
For the first two, I bought two quilting cottons from Peapod Fabrics. I'm lucky enough to live very close to Peapod, and the owner carries a beautiful collection of prints. I did the first tank, with no modifications to the pattern, out of the slightly heavier cotton print. It's such a cheerful color, and goes so well with my red cardigan!
 |
| Sorry for the low-res photos. Yes, I've gotten into Instagram. |
For the second one, I had some 100% cotton lace edging that I knew I wanted to use. After playing around with several options, I decided to put it around the neckline. The effect is very sweet in a way that makes me think of Anne of Green Gables or Little House on the Prairie. It's not a look I go for every day, but I like it nonetheless.
 |
| Taken before I'd finished the sleeves. |
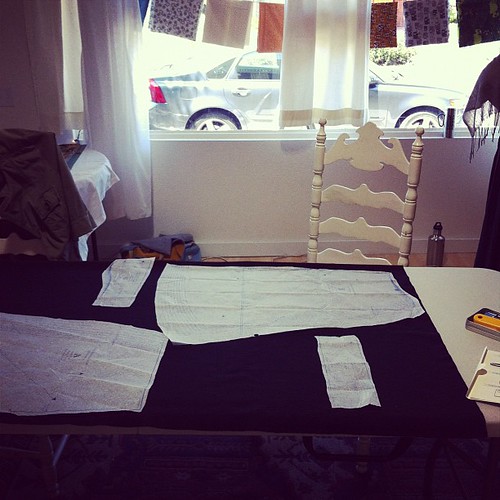
This fabric was much more lightweight than the first one, and made me think that perhaps I could've used a bit more room in the bust on the first one. I was reluctant to print out the entire pattern again just so I could cut a larger size, so before making the third one I decided to dive into doing my first full bust adjustment (FBA for short). I sat down with my scissors, tape, extra paper, ruler, and then spent about two hours reading tutorials before I felt I had a good idea of what I was doing. Because the Sorbetto doesn't have waist darts I ended up adding a significant amount of space to the waist circumference, so in the future I might grade that down just a bit to compensate. This is what my pattern piece looked like before I filled in the gaps with extra paper. I'm not sure that I drew the new bust dart in exactly the right place, but it gave me the extra room I was looking for.
 |
| Doing a FBA makes you feel as smart as doing calculus. |
I also decided my third Sorbetto should be a tee instead of a tank, and I used the free sleeve pattern from Sew, Incidentally. I was a little apprehensive that it only came in one size, but it worked like a charm. In the future, I think this would be a great pattern to practice drafting sleeves for, since it's not too complex. Once I'd attached the sleeves and tried on the top, it was immediately obvious how much the FBA helped. I never realized how accustomed I'd become to wearing tops that never had enough fabric in the bust! I actually have enough freedom of movement of my arms in this top, and the fronts of the sleeve seams aren't under strain. This was a huge step for me in terms of expanding my sewing knowledge. I pulled out a fat quarter of a sweet Liberty of London print for my bias tape edging, and improvised a keyhole opening at the back of the neck (I was inspired by the photo in the bias tape tutorial).
 |
| Hanging from the door to our ironing board closet. |
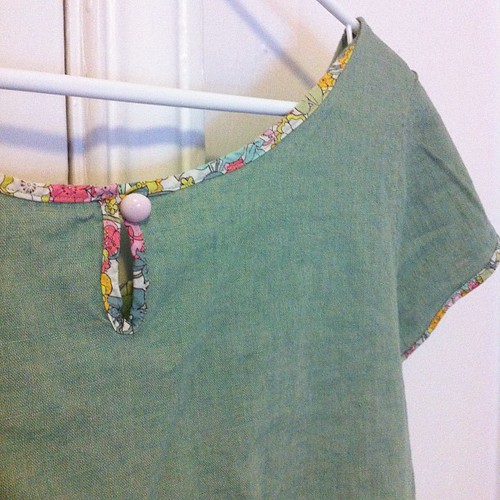 |
| Those Liberty prints kill me every time! So gorgeous! |
The finishing is a little rough on the inside of that opening, but I'm pretty proud of myself for making it up. These three tops are already in my regular rotation, and I'm certain I'll be making more from this pattern. I've seen so many adorable variations: inverting the pleat, leaving the pleat open on the bottom, eliminating the pleat altogether, different sleeve styles, lengthening the bottom hem for a tunic or short dress... this dress and tank are two of my favorite versions of all the ones I've seen on the web. The only downside to all this sewing with woven fabrics is that I'm doing a lot more ironing in the mornings when I get ready for work, but it's so worth it knowing I'm wearing something that I made and that is truly unique!
Monday, July 16, 2012
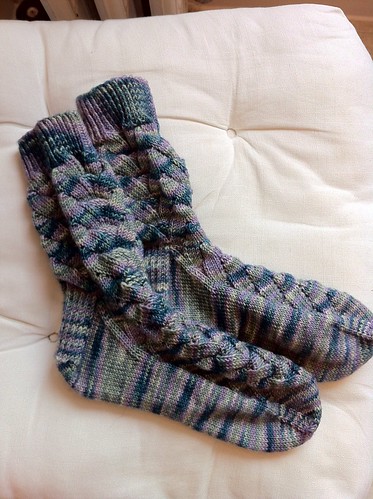
Knitting FO: Lunasea Socks
I could probably temporarily rename this blog "Adventures in knitting stuff that I've had queued on Ravelry for more than 2 years", with the way I've been choosing projects lately. The latest FO is another pair of socks (first official knitting project for the Seam Allowance!): the Monkey pattern by Cookie A., out of Blue Moon Socks That Rock Lightweight in the Lunasea colorway. This sock yarn has, in the past, been a little odd to work with. It's a very dense sock yarn, really almost a sport weight compared to stuff like Tosh sock or Malabrigo sock. It's also very tightly spun and plied, and thus it's not nearly as rub-against-your-cheek-and-sigh soft as those, either. It knits up into an incredibly hard-wearing fabric, though. Of all the sock yarns I've knit with, the socks I've knit out of this yarn have yet to get holes (and after five years of being in the rotation, that's saying something).
Gauge has been tricky for me with this yarn in the past, though. Knitting it up on size 0's is ridiculously dense: more like kevlar than socks. Knitting on size 1.5's often yields a sock that is comically large in the foot, though. Oh, and I should mention that only recently have I acquired size 1 sock needles. So for these socks, I knit the feet on size 1's and the legs on size 1.5's, and it worked like a charm! They fit nicely, and I'm still as in love with this colorway as I was when I first purchased the yarn back in 2007 (yikes).
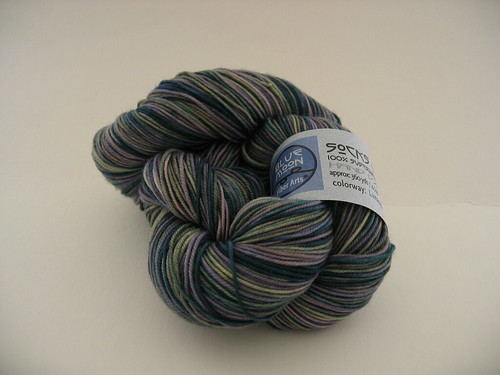
Gauge has been tricky for me with this yarn in the past, though. Knitting it up on size 0's is ridiculously dense: more like kevlar than socks. Knitting on size 1.5's often yields a sock that is comically large in the foot, though. Oh, and I should mention that only recently have I acquired size 1 sock needles. So for these socks, I knit the feet on size 1's and the legs on size 1.5's, and it worked like a charm! They fit nicely, and I'm still as in love with this colorway as I was when I first purchased the yarn back in 2007 (yikes).
Just like everyone else in knitterdom has told you, the Monkey pattern is a great one. There's a reason it's so popular: the lace pattern isn't too hard to read or memorize, it does a great job of breaking up any potential pooling in your variegated yarns, and the rest of the sock construction is straightforward. I will almost certainly knit this pattern again sometime, as I still have lots of variegated sock yarn in the stash.
Tuesday, June 26, 2012
Starting thoughts on the Seam Allowance project
One of my larger goals this summer is to learn more about sewing clothing. I took a garment-sewing class at Verb during spring break (and meant to blog
about it then, really I did!) and eventually finished the top. I like the shirt quite a bit, and have worn it four or five times since completing it. For those who are interested, this is the "Violet" top by Colette Patterns, and the fabric is a lightweight cotton floral print by Lecien.
It got me excited to sew more clothing, but I didn't have the mental energy to put
together anything more complicated than a quilt with rectangles during
the second half of the semester. As final exams wound down, my thoughts returned to more clothing. Knitting sweaters is all well and good in October, but in June my thoughts were on breezy tank tops and sundresses. As she so often does, Kristine at Verb read my mind and has started an initiative that she's named "Seam Allowance". In my head, I've been imagining this as a learning community and support network. It's well-timed both in terms of my interests and work schedule; summers are always less hectic for me. So this is what my kitchen table looks like these days (except messier, and with more fabric scraps scattered all over the place):
The Seam Allowance pledge is to make 25% of your wardrobe, and all forms of creating garments are allowed: sewing, knitting, weaving, crochet, etc. I have to admit that I was a little hesitant at first; 25% sounds like a lot of clothes when I consider my closet and dresser. Am I over-committing myself to a project that I will burn out on once my work picks up again in the fall? And what does 25% of my wardrobe even mean? What do I want it to mean? What do I want to get out of this? What do I want to learn? How do I want to change?
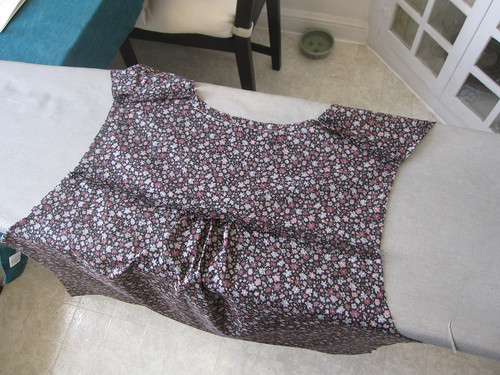 |
| Joining the fronts and back of the shirt. |
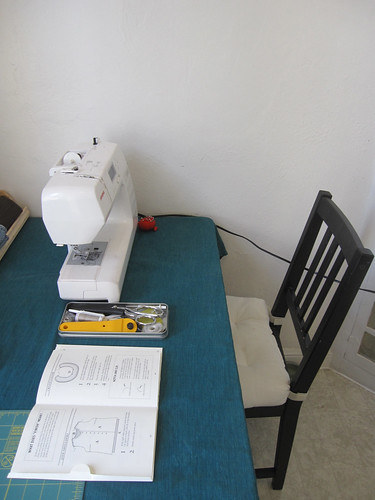 |
| The sewing station. |
 |
| Another Violet shirt, this time out of midweight cotton from a discount store in Anaheim. |
I decided to join after doing some thinking. Yes, 25% of my wardrobe feels like a lot, but that's primarily because I have lots of clothing that I don't wear. Some of these items just aren't for everyday (pantyhose and strapless party dress, I'm looking at you). I have no guilt or anxiety about hanging onto these items or having purchased them instead of making them. Some of them are for everyday, and I'm holding onto them for slightly sentimental reasons even though I don't wear them. This category includes clothing items that were gifts but don't quite fit my style, band t-shirts purchased at concerts out of commemoration, and clothing that used to fit but is a little too small these days. Some (maybe most) of these items should probably go to the donation bin. So one of the things I'm hoping to get out of my participation in Seam Allowance is to make more conscious decisions about my wardrobe, and thus keep it to a manageable size. Kristine suggested that 25% could mean that we have enough handmade clothing to wear one handmade item every day. I still haven't quite decided what I want 25% to mean, but I think I'd like to define a core set of clothing items that are in "regular rotation" (i.e., they get worn at least once every two weeks, or something like that) and have 25% of my regular rotation items be handmade.
I also have several goals involving body image that are tied up in Seam Allowance, but I'll write more about those later because they really deserve their own post.
Oh, and I'm counting all my handknit socks, too.
Tuesday, June 19, 2012
Knitting FO: Darjeeling Socks
A large portion of the sock yarn I own was collected between 2007-2009, or as I'm going to call them, "The Variegated Years". This was a time when I was fresh out of grad school, dizzy with the prospect of a real honest-to-goodness paycheck coming in every month. It was during this time period that my stash size exploded, and one very big enabler instigator assistant in this process was The Loopy Ewe. Now, don't get me wrong, I love Sheri over at Loopy. She helped me build a very nice sock yarn stash that is a beautiful (if a bit worryingly large) source of inspiration.
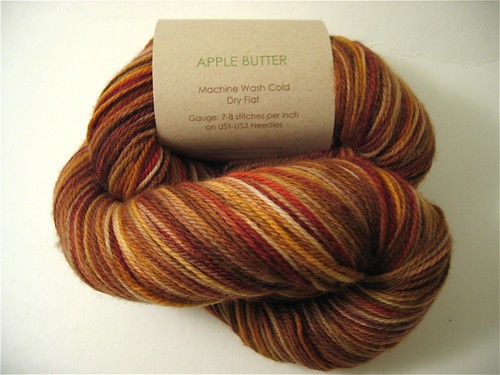
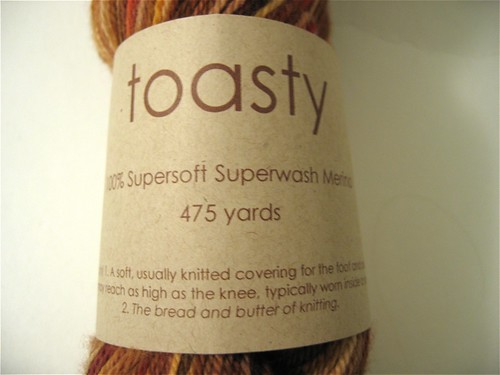 This yarn, Numma Numma Toasty in the colorway "Apple Butter" was no exception. And plus, it's mostly browns and tans! They're neutrals, so they'll go with anything, right? Right, except we have to actually KNIT the socks before we can dash around in their delicious golden-hued warmth, pretending we live somewhere the leaves on trees change color in the fall. I actually went back to my order history and saw that this yarn was purchased in January 2008, which means I've had this yarn sitting around in my stash for more than four years.
I bet if, back in 2002 you'd asked my husband-now-but-boyfriend-at-the-time if this knitting thing would go this far, he would not have ever suspected that I could be the type of person capable of purchasing yarn and then hanging onto it for more than 4 years because it was just too pretty to let go. What can I say? Must be the wool fumes.
If I love the yarn so much, how come it's taken this long? Well, I went off sock knitting for a while, and then just when I started to get back on the wagon, something had shifted subtly in sock knitting. Before, everyone was looking at color combos and coming up with hilariously funny (and sometimes punny) names for their colorways. Now, it was all about solids and semi-solids and shaded solids. Or self-striping, but in the very meticulous way that means you probably just want to knit a plain old pair of stockinette socks and not put any kind of stitch pattern on there to muss up the colors. It was just that much more difficult to find a pattern that I could really visualize in a variegated yarn.
The Darjeeling Sock from Knitter's Book of Socks though, had all the hallmarks of being a good pattern for a very colorful yarn. Purl-stitch rows, broken ribbing, and on top of that it has interesting arch shaping in an unexpected place! I was flipping through the book trying to decide which pattern to knit after finishing my pajama socks, and knew this would be next. And I was right, it's great for variegated yarn.
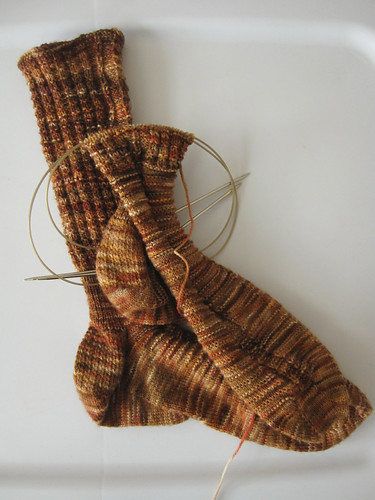
I've since finished these socks, and they're very nice. I've learned to make my socks a tiny bit longer in the feet, since the soles of my socks tend to felt a tiny bit and shrink up after many wearings, and I think this will help them hold up a little better. I did the surprisingly stretchy bind-off at the top of these socks, which was a new technique for me. I knit these until I practically ran out of yarn, so they end quite high on my leg and the extra stretch is more than welcome. I'll probably knit this pattern again, and I think the only thing I'd change is the pattern on the heel flap, which was a little hard to keep track of during knitting. But other than that, I can't wait to add these beauties into my sock rotation on the next chilly morning!
I bet if, back in 2002 you'd asked my husband-now-but-boyfriend-at-the-time if this knitting thing would go this far, he would not have ever suspected that I could be the type of person capable of purchasing yarn and then hanging onto it for more than 4 years because it was just too pretty to let go. What can I say? Must be the wool fumes.
If I love the yarn so much, how come it's taken this long? Well, I went off sock knitting for a while, and then just when I started to get back on the wagon, something had shifted subtly in sock knitting. Before, everyone was looking at color combos and coming up with hilariously funny (and sometimes punny) names for their colorways. Now, it was all about solids and semi-solids and shaded solids. Or self-striping, but in the very meticulous way that means you probably just want to knit a plain old pair of stockinette socks and not put any kind of stitch pattern on there to muss up the colors. It was just that much more difficult to find a pattern that I could really visualize in a variegated yarn.
The Darjeeling Sock from Knitter's Book of Socks though, had all the hallmarks of being a good pattern for a very colorful yarn. Purl-stitch rows, broken ribbing, and on top of that it has interesting arch shaping in an unexpected place! I was flipping through the book trying to decide which pattern to knit after finishing my pajama socks, and knew this would be next. And I was right, it's great for variegated yarn.
I've since finished these socks, and they're very nice. I've learned to make my socks a tiny bit longer in the feet, since the soles of my socks tend to felt a tiny bit and shrink up after many wearings, and I think this will help them hold up a little better. I did the surprisingly stretchy bind-off at the top of these socks, which was a new technique for me. I knit these until I practically ran out of yarn, so they end quite high on my leg and the extra stretch is more than welcome. I'll probably knit this pattern again, and I think the only thing I'd change is the pattern on the heel flap, which was a little hard to keep track of during knitting. But other than that, I can't wait to add these beauties into my sock rotation on the next chilly morning!
Tuesday, June 12, 2012
Spinning Update: A sweater for the husbeast
For the longest time, I've been avoiding posting about my spinning because it's been so boring. I mean, when your husband starts asking when he'll get his own handspun handknit sweater, it's such a happy moment. I had so much fun with the first one! Washing the fleece, immersing myself (literally) up the elbows in the processing of what comes off the sheep into a wearable garment. That thing is my go-to sweater for beach parties. It all sounds like so much fun, until you stop and think about all the knitted items you've made for yourself that never get worn, or get worn so infrequently that it hardly seems worth the effort you put into them in the first place. You begin to realize that you'll just kill yourself if you make something that he wouldn't wear, so you have to start asking him about clothing preferences.
Let's just summarize a few facts here. The husbeast is the kind of person that A) doesn't like anything too fancy (no colorwork) B) naturally runs a little warm and thus C) owns precisely one other sweater. Oh, and this is the sort of sweater I want him to feel comfortable wearing around the home, so nothing too tight. Did I mention that the man is also 6 feet tall, and has extra-long arms for his height? This is going to be one huge sweater, and if I was going to spin for it, that meant a major commitment to spinning a solid color. I started spinning the singles during last year's Tour de Fleece, and haven't gotten anything new on the wheel until last week!
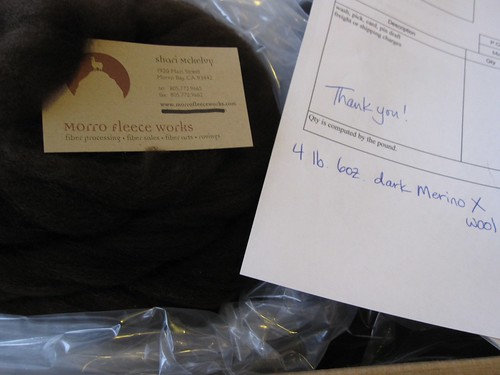
That's why my fleece (Blake, the one I got washed by Morro Fleece Works) was the perfect match for the project. First, I have a TON of fiber. Ok, not an actual ton, more like 4+ pounds. I tend to spin yarn that is denser than commercial yarn, so I knew having a large amount was important for a big sweater for a grown man. Second, it's all one color. Further to that, the beautiful chocolate brown is a color I know the husbeast won't find objectionable and since it's the natural color of the sheep's wool, it won't fade over the years the way something dyed might do. Third, it's a really heavenly preparation from Morro, which means very little predrafting and overall faster spinning.
The challenges have been keeping myself motivated to keep spinning the same dark brown merino wool over the months, and to keep myself spinning consistently. I made a few choices in designing what type of yarn I'll spin to help with consistency. I'm doing a 3-ply yarn (a true 3-ply, not a chain or navajo 3-ply) and spinning six bobbins in a row before plying. That's truly the most boring part, spinning 24 ounces of brown wool singles without the quick break of plying in between. Having six bobbins allows me to mix & match my plies to help even out the yarn a little bit. I label the bobbins 1-6 in the order in which I spin them, then I ply 1, 3, and 5 together and 2, 4, and 6 together. My yarn is ending up in the heavy-worsted-to-aran-weight range, which is quite plump. Having a thicker yarn means that small inconsistencies won't be quite as noticeable.
The color boredom I've been getting around by letting myself spin a bag of Hello Yarn fiber in between each "batch" of 6 bobbins, so right now I'm spinning my "Curiosities" superwash merino.
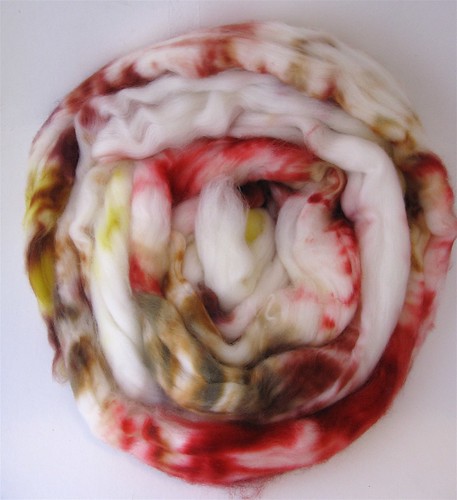
Hopefully getting to play with a little color will help me stay motivated. We'll just try to ignore the fact that I've already got one dark brown sweater on the needles (more on that later) and am preparing to knit a second, larger, dark brown sweater.
Let's just summarize a few facts here. The husbeast is the kind of person that A) doesn't like anything too fancy (no colorwork) B) naturally runs a little warm and thus C) owns precisely one other sweater. Oh, and this is the sort of sweater I want him to feel comfortable wearing around the home, so nothing too tight. Did I mention that the man is also 6 feet tall, and has extra-long arms for his height? This is going to be one huge sweater, and if I was going to spin for it, that meant a major commitment to spinning a solid color. I started spinning the singles during last year's Tour de Fleece, and haven't gotten anything new on the wheel until last week!
That's why my fleece (Blake, the one I got washed by Morro Fleece Works) was the perfect match for the project. First, I have a TON of fiber. Ok, not an actual ton, more like 4+ pounds. I tend to spin yarn that is denser than commercial yarn, so I knew having a large amount was important for a big sweater for a grown man. Second, it's all one color. Further to that, the beautiful chocolate brown is a color I know the husbeast won't find objectionable and since it's the natural color of the sheep's wool, it won't fade over the years the way something dyed might do. Third, it's a really heavenly preparation from Morro, which means very little predrafting and overall faster spinning.
The challenges have been keeping myself motivated to keep spinning the same dark brown merino wool over the months, and to keep myself spinning consistently. I made a few choices in designing what type of yarn I'll spin to help with consistency. I'm doing a 3-ply yarn (a true 3-ply, not a chain or navajo 3-ply) and spinning six bobbins in a row before plying. That's truly the most boring part, spinning 24 ounces of brown wool singles without the quick break of plying in between. Having six bobbins allows me to mix & match my plies to help even out the yarn a little bit. I label the bobbins 1-6 in the order in which I spin them, then I ply 1, 3, and 5 together and 2, 4, and 6 together. My yarn is ending up in the heavy-worsted-to-aran-weight range, which is quite plump. Having a thicker yarn means that small inconsistencies won't be quite as noticeable.
The color boredom I've been getting around by letting myself spin a bag of Hello Yarn fiber in between each "batch" of 6 bobbins, so right now I'm spinning my "Curiosities" superwash merino.
Hopefully getting to play with a little color will help me stay motivated. We'll just try to ignore the fact that I've already got one dark brown sweater on the needles (more on that later) and am preparing to knit a second, larger, dark brown sweater.
Monday, June 4, 2012
Putting the "starry" back in Starryknit
I usually try to keep it to crafty stuff on the blog, because talking about the starry part of my blog/Ravelry name sometimes feels a bit too much like my day job. However, I'm making an exception because the semester ended two weeks ago and this event is so special it's worth writing about.
Tomorrow afternoon the planet Venus will be nearly perfectly lined up with the Sun and Earth, and we'll be able to watch Venus "transit", or cross in front of the Sun from our vantage point on Earth. It's like a mini-eclipse, except that Venus will only cover up a tiny portion of the Sun's surface. This is a very rare occurrence, for several reasons:
1. Earth and Venus are tiny. To scale, if we made the Sun about the size of a large grapefuit, Venus and Earth would be the size of poppy seeds. Picture that in your mind for a second.
2. Earth, Venus, and the Sun are all very far apart. They call it "space" for a reason: it's mostly empty! In our poppy-seeds-and-grapefuit model, Venus and Earth would be about 35 feet and 40 feet away from the Sun, respectively. Even though Venus is at its closest approach to Earth, it will look like a smallish black spot on the Sun tomorrow, only covering up about 0.1% of the surface area of the Sun.
3. The orbit of Earth and the orbit of Venus are not in the exact same plane. Another way to say this is that their orbits are tilted relative to one another. If you think about those two poppy seeds, you can imagine how even a very small difference in the orbital planes means that most of the time, Venus is NOT transiting the Sun even when it's at its closest approach to Earth.
Okay, so how rare are we talking here? Well, the last transit of Venus happened in 2004. That doesn't sound too bad, right? Only eight years of waiting. If it's cloudy, no big deal. I'll catch the next one. Except the next one doesn't happen until the year 2117. Read that again: I said 2117, not 2017. So unless you plan on living an additional 105 years, you won't be able to catch the next one. As I've been telling ALL of my students, friends, and family: this is LITERALLY a once-in-a-lifetime event.
Hopefully by this point I've convinced you that it's worth stepping out for ten minutes tomorrow afternoon to try and view the transit. If you're interested in doing so, I have a very important safety warning for you. (If this were a 1970's instructional video, I would be wearing a lab coat and would take a second to don my lab goggles right now). Please promise me that no matter what, you will NOT LOOK DIRECTLY AT THE SUN. Even if you have sunglasses, it's just not safe. Sunlight is very bright (especially at 3PM in early June in the northern hemisphere, but that's another science lesson for another day), and it will damage the rod and cone cells on your retina. The website transitofvenus.org has some great information about safely viewing the transit. If you're in a pinch, take two sheets of paper and use a safety pin to poke a small hole in one sheet. Hold the sheets parallel to each other, using the pinhole to project an image of the Sun onto the other sheet.

You can play around with holding the sheets of paper closer together or farther apart, to get the best balance between a large enough image and a bright enough image. Just to be clear, you don't look through the pinhole, you look at the image of the Sun that will appear on the second sheet of paper.
Now that we've got the safety portion out of the way (takes off safetly goggles), let's talk timing. This transit has some historical significance in addition to being a rare event. As I said before, we had one transit in 2004, then this year's in 2012, and the next one is in 2117. This is the regular pattern of Venus transits: a pair separated by about 8 years, with pairs spaces about a century apart. Back in 1761 and 1769, astronomers were especially excited to observe and precisely time the two transits of Venus because they could use the information to measure exactly how far away the planets were from the Sun in our solar system. Up until then, we knew how far away everything was proportionally (for example, we knew that Jupiter was about 5 times further away from the Sun than Earth), but we didn't have an absolute measurement (number of miles/kilometers) for any of those distances. Despite people all over the world observing both transits in the 1760's, their timing wasn't accurate enough to calculate these distances. Science had to wait until the pair of transits in 1874 and 1882 (when photography of the phenomenon was possible) to determine the distance scale of the solar system. Sky and Telescope has published a fascinating piece about two astronomers who stitched together the photographic plate negatives taken at California's own Lick Observatory in 1882 into a 30-second digital movie.
So when should you take your makeshift pinhole camera outside and view this once-in-a-lifetime event? Well, it depends on where you'll be on our little planet. Thankfully I've found a very good transit-time-calculator that will tell you when you'll be able to see the transit. If you're in the SF Bay area, the transit begins shortly after 3PM and will still be going when the Sun sets. I'll be out in a campground, eating barbeque, knitting a pair of socks, and celebrating my 30th birthday.
Thursday, May 31, 2012
Sewing FO: Quilted Coasters
Just a quickie post this time to talk about my new favorite and fast hand-sewn gift: coasters. About a year ago I signed up for Verb's Pressed Seam fat quarter club, which means that every month I have six delightful new fat quarters of fabric arriving at my door. I really love the idea behind yarn/fiber/fabric clubs both as a way to steadily support small creative businesses and as a way to grow creatively myself. Clubs often get me to try things that I would normally not choose for myself; and as long as I'm careful in selecting clubs that are put together by people with whom I share similar tastes in colors/prints, I rarely get something I outright dislike. More often opening club packages is a happy mixture of "Ooh, beautiful!" and "I would never have picked this out for myself, but it's so INTERESTING!".
With the fabric club, getting a steady influx of fat quarters is a great way to keep the creative juices going. The first month I managed to use five out of the six fat quarters right away, and the second month I used three. After that, I started to lag. Six months in and I was still wowed by every shipment, but had fallen into the habit of washing the fabric, pressing it, and returning it to the plastic fabric bin. I started to feel a little guilty about how much fabric I was amassing (although we'll have another post later on stash guilt), and started looking around for ways to use up some of those fat quarters. Along comes the delightful little quilted coaster pattern from Last-Minute Patchwork and Quilted Gifts (by the same author as Last-Minute Knitted Gifts).
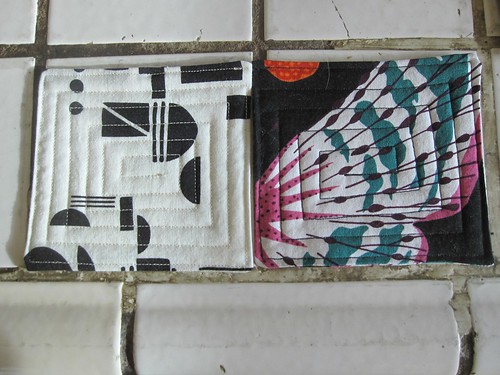
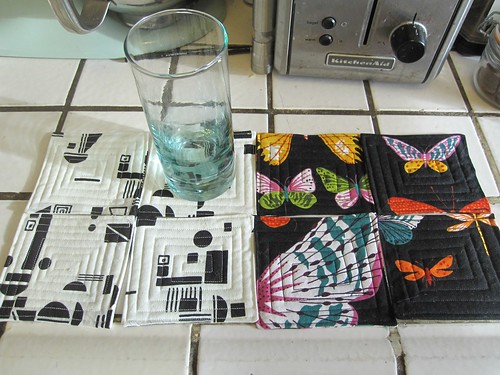
I chose several prints and spent two afternoons making about twenty coasters. About half ended up being a gift for my sister-in-law. Originally I was a bit worried that the coasters would be too bumpy to be really practical, but they're great! The only part that really took some practice was cutting out squares of batting and stuffing them in the folded-up coasters, but it got easier after I'd done four or five. And now that I've done the pattern all the way through several times, I think I could get into a good production-line rhythm with them. Here's the entire set that I selfishly kept for myself, with a large water glass for scale. My favorite one is the butterfly print where the coaster is nearly completely taken up by one giant wing!
With the fabric club, getting a steady influx of fat quarters is a great way to keep the creative juices going. The first month I managed to use five out of the six fat quarters right away, and the second month I used three. After that, I started to lag. Six months in and I was still wowed by every shipment, but had fallen into the habit of washing the fabric, pressing it, and returning it to the plastic fabric bin. I started to feel a little guilty about how much fabric I was amassing (although we'll have another post later on stash guilt), and started looking around for ways to use up some of those fat quarters. Along comes the delightful little quilted coaster pattern from Last-Minute Patchwork and Quilted Gifts (by the same author as Last-Minute Knitted Gifts).
I chose several prints and spent two afternoons making about twenty coasters. About half ended up being a gift for my sister-in-law. Originally I was a bit worried that the coasters would be too bumpy to be really practical, but they're great! The only part that really took some practice was cutting out squares of batting and stuffing them in the folded-up coasters, but it got easier after I'd done four or five. And now that I've done the pattern all the way through several times, I think I could get into a good production-line rhythm with them. Here's the entire set that I selfishly kept for myself, with a large water glass for scale. My favorite one is the butterfly print where the coaster is nearly completely taken up by one giant wing!
Subscribe to:
Posts (Atom)